Last week, I started recounting my first non-kit winemaking attempt last summer, using frozen Zinfandel must from Brehm. Check out part 1, here.
Topping Up
Immediately after racking the freshly fermented must to a 3 gallon carboy, I could see a problem coming. There was a good amount of headspace at the top of the carboy. I planned to use this vessel for the aging process after fermentation as well and by that point, there wouldn’t be any protective CO2 coming off of the wine. Doing most of your winemaking education online leaves you with a distinct fear of oxygen exposure. So before the fermentation stopped, I had to get that level up.
I tried to read all I could about what folks do in this situation: marbles, bladders, vacuums, water. The easiest (lazy winemaker here!) seemed to be simply adding other, similar wine. This is a little disappointing since it’s diluting the originality of the final product, but it seemed better than diluting it with water, buying expensive equipment, or risking the marbles breaking the carboy.
I didn’t want to top up with Carlo Rossi, or the closest to cheap, bulk wine that I could find. I wanted something that would minimally mess with any further development that it still had to go through, so stuff loaded with additives wasn’t in the picture. I visited one of our local natural wine–focused spots, Terroir, and their bartenders recommended the cheapest, no-added-sulfites red blend containing Zinfandel that they were able to think of. I’m sadly forgetting the brand.
Before I topped up, I wanted the fermentation process to lose some steam and I also had to get it off the gross lees (the large amount of dead yeast cells that gathered at the bottom). After just a couple of days, the gross lees had settled, so I racked out of and back into the carboy. This fixes the one issue, but exacerbates the headspace issue. I kept an eye on the airlock of the carboy and after some number of weeks (days? really unclear here) the CO2 coming off the ferment had slowed. I figured the CO2 blanket was weakening, so it was time to reduce the headspace.
On Sulfites
So after another rack-out, sanitize, rack-in exercise, I added some potassium metabisulfite and planned to let it sit there for another 6 months.
Here’s what I was thinking on each of those points. As to the racking, that’s easy: I wanted to get it off the sediment for flavor/clarity purposes. As to the sulfite, that’s a bit more complex. I mean, didn’t I go through the trouble to find a sulfite-free topping up wine? Wasn’t I heaping praise on Tony Coturri a few posts ago? Yes. But, it seemed the cautious thing to do in order to protect it against oxidation as it aged and I was mostly just trying not to screw up. So, I added sulfites. My internet-research led me to the conclusion that 1/4 teaspoon of potassium metabisulfite per 5 gallons was a recommended dose every 3–4 months, so I figured 1/8 of a teaspoon for my 3 gallon batch would be a conservative approach.
Frankly, I probably put in too much for the natural wine crowd and too little to make a difference if things went wrong. But, it was a security blanket of sorts.
Letting it Hang
Finally, the 6 month carboy aging. In retrospect, there may not have been much science to this at all: half a year is a nice even amount of time. I figured I wouldn’t be stuck in this racking-and-sulfiting every 3–4 months if I could just wait a clean 6, sulfite it once more before bottling and call it a day. Another guess of mine was that this would be enough time for the CO2 trapped in the wine to escape. (I’m sure I’m making experienced homewinemakers groan at my laziness and imprecision. Again, lazy winemaker here.)
Six months is a long time to wait. Even longer, knowing that I intended to age it another 6 in the bottle. But, the day eventually came. I racked the wine into the (sanitized) fermenting bucket and sulfited using the same ratio as before. A good amount of dead yeast had collected at the bottom. I saw this as the 6 months went by and was worried that it would negatively affect the flavor. I consoled myself by remembering that often wines are aged sur lees.
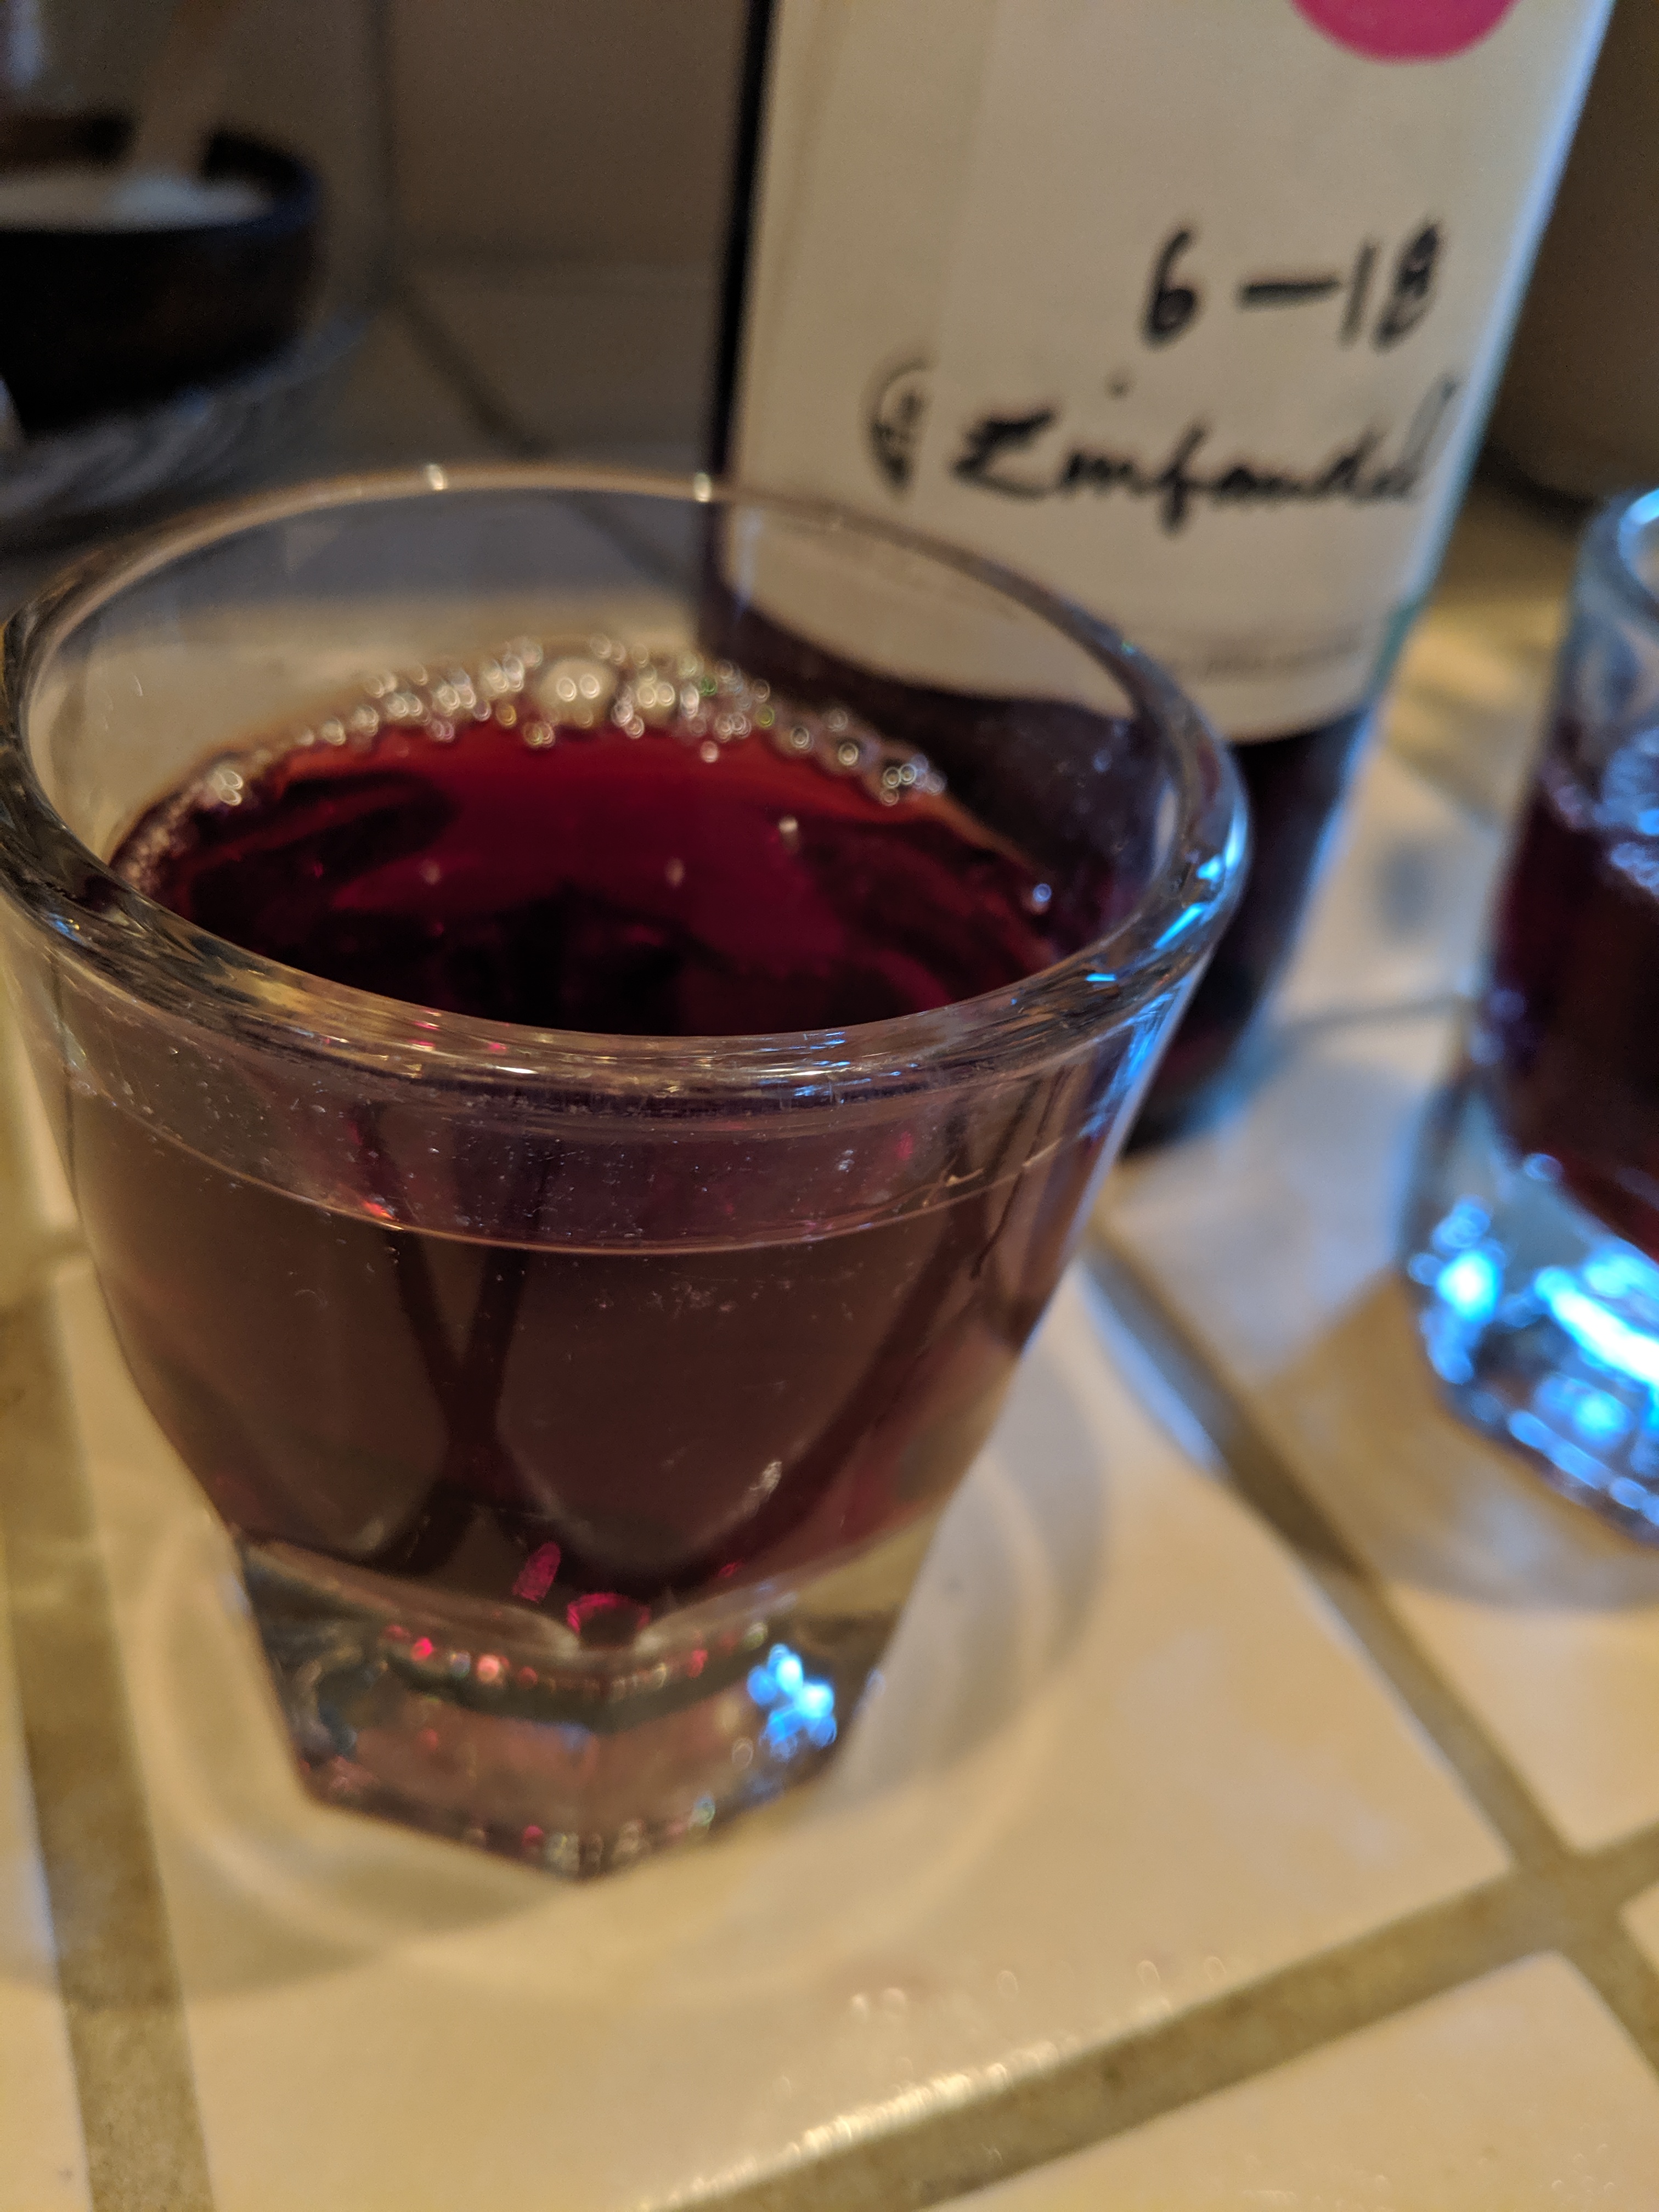
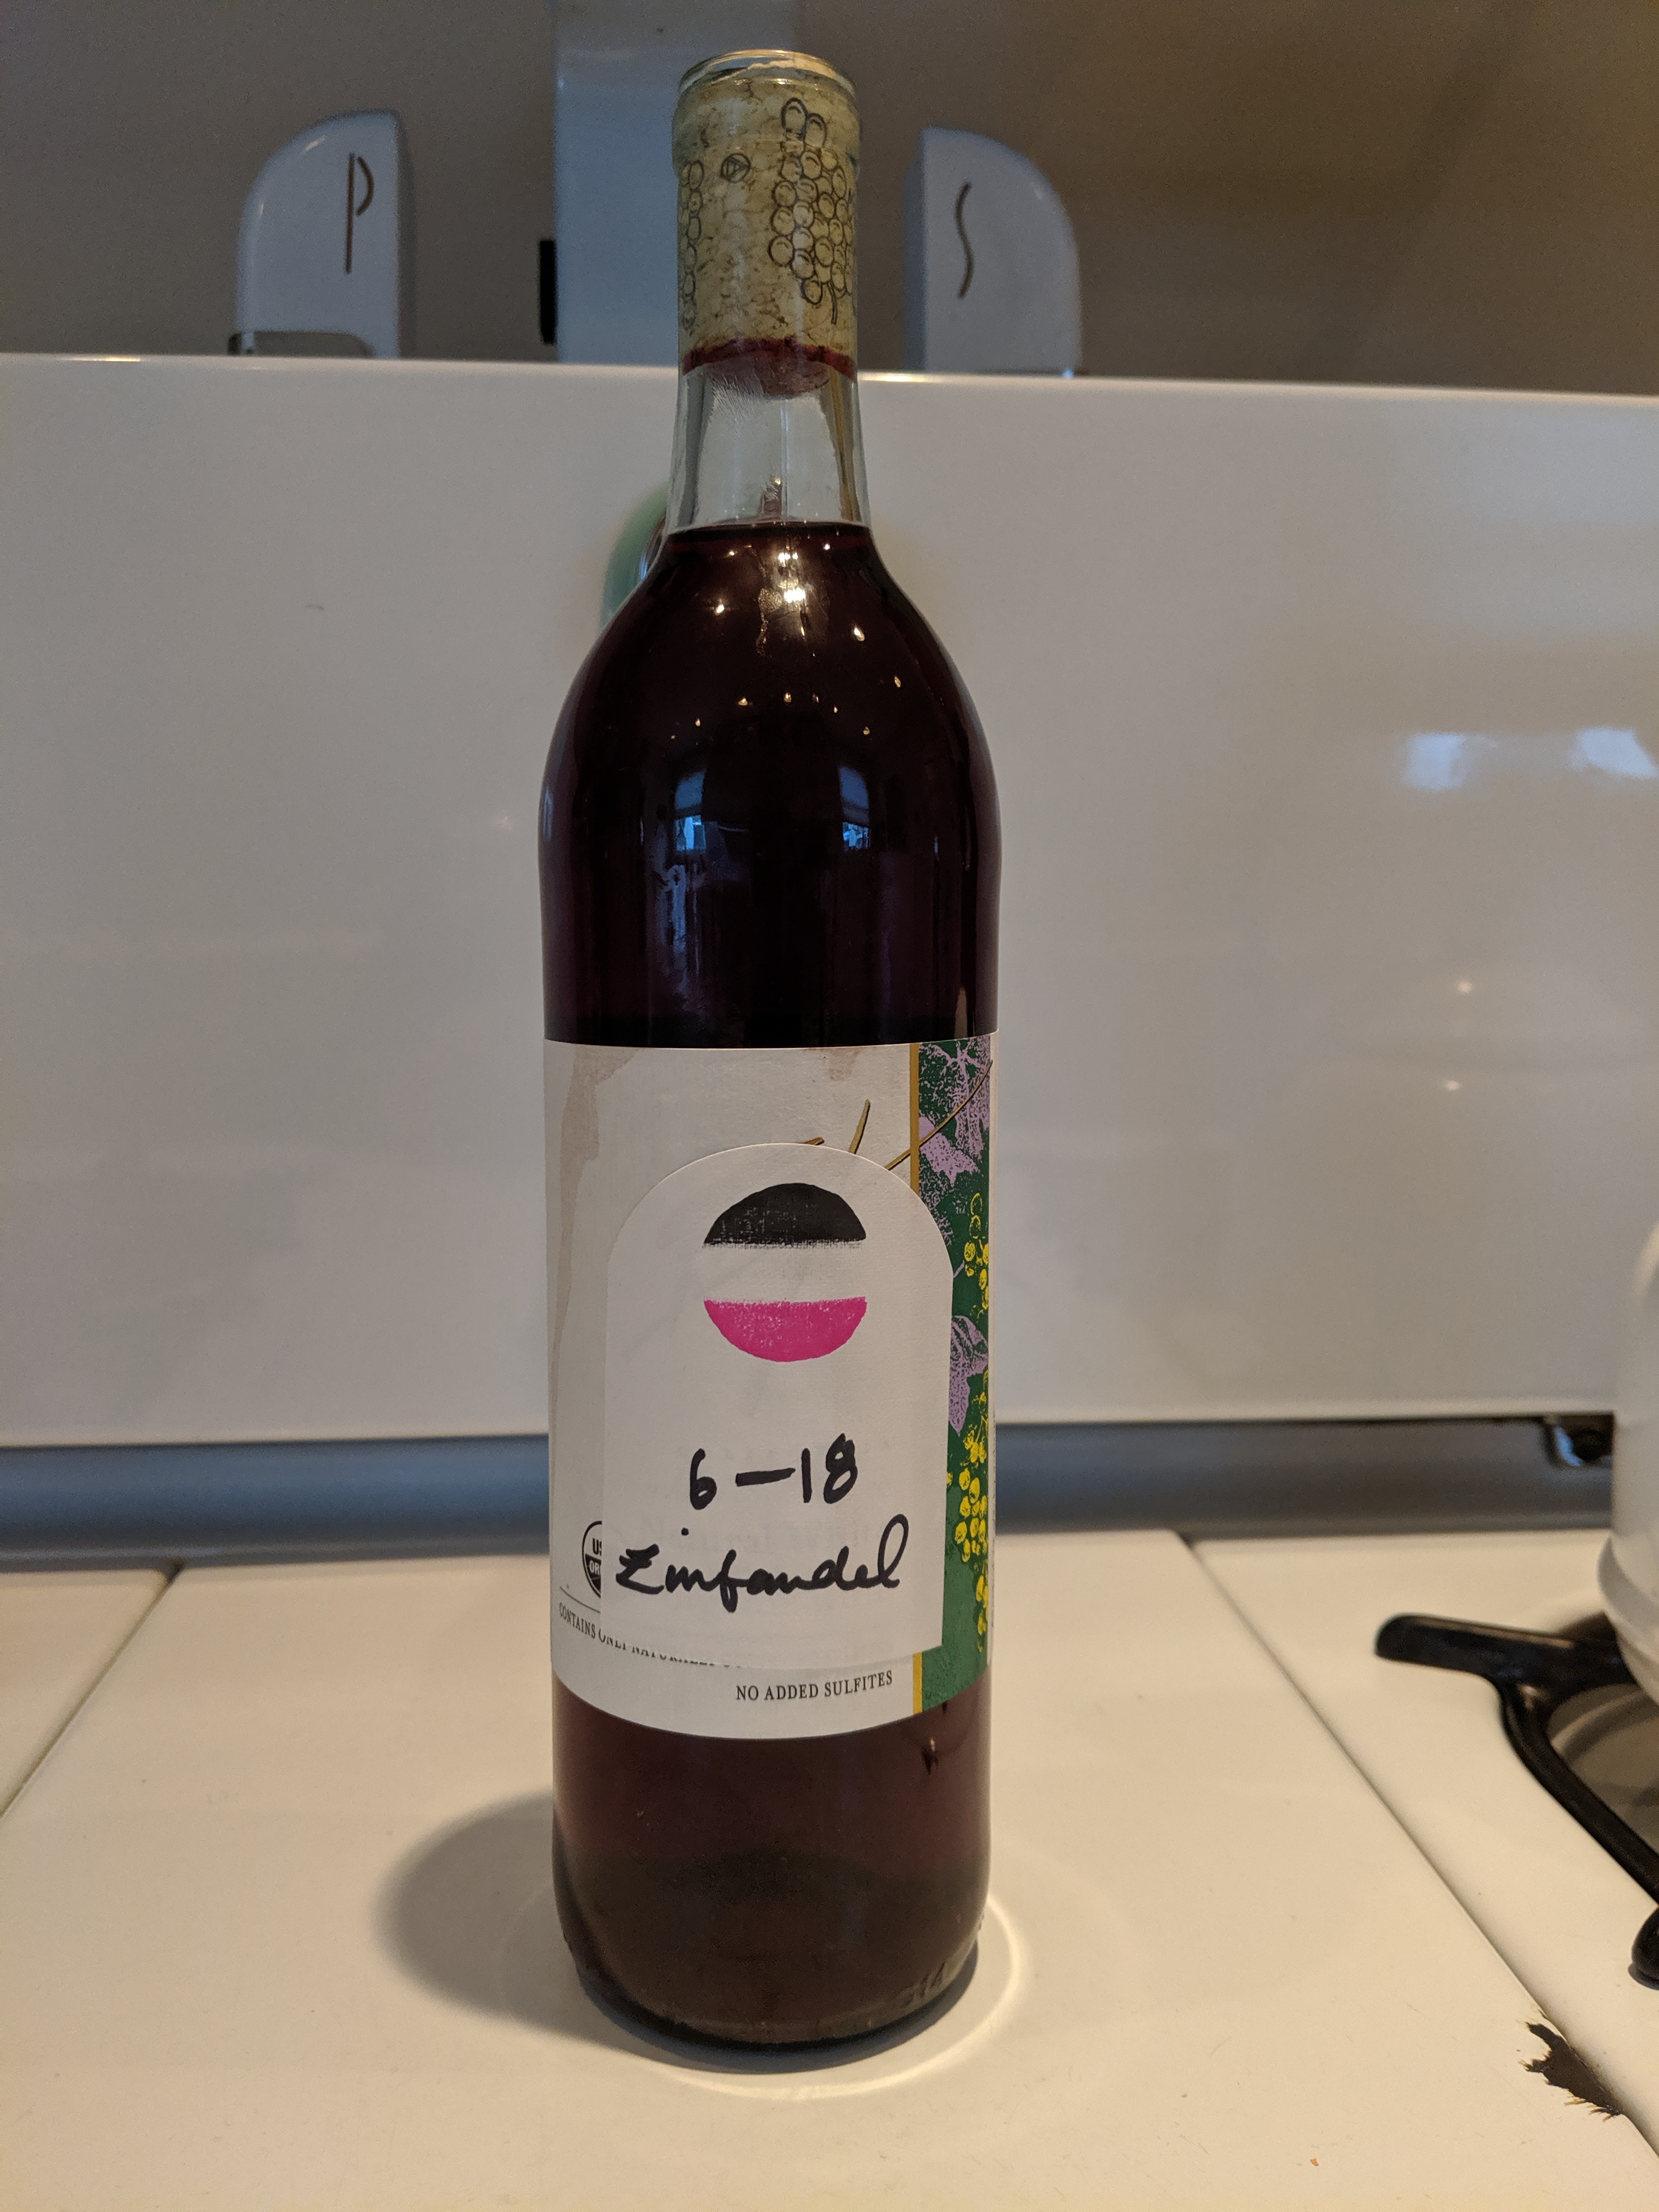
After I bottled, it was another 6 months just hanging out. My partner had a pretty great, easy labeling concept. It sure beats using the label of the wine that formerly occupied the bottle.
The Big Reveal
Friday night, I opened up the first bottle. My first impression was that it was a heck of a lot lighter in color and translucent that you’d typically expect a zin to be. I’m guessing that’s a result of me pressing it off the skins before it had reached a greater level of extraction. At the time, I thought I was leaving a bit longer that I should have, but now I’m thinking that it could have withstood another week in there getting punched down a few times a day.
The aromas were actually pleasant and reasonably complex: kind of like a dusty plum. And on tasting it, my impressions were: dry, austere, earthy, with a hint of that plum again. I’m wondering how this will change over time, but this is pretty good now.
In other words: success! I made a decent red wine! This was leaps and bounds better than the kit-wines I had made. While those are still quite fruity and sweet, even 1+ year later, I could serve this to an unknowing guest and they wouldn’t jump to the conclusion that I made this in the basement.
I think this just confirms what I thought before, the Riesling I’ve got going now is my last kit-based wine. If I want to make an off-season batch, I’ll go with frozen grapes.

2 thoughts on “FroZin, pt. 2: The verdict”